Whether breathing new life into a classic car, customizing a motorcycle, or dedicating time to a complex electronics project, building your own custom wire harness is a profoundly satisfying challenge. Once you’ve mastered this skill, it not only grants a real sense of accomplishment but also ensures your electrical system is perfectly tailored to your unique needs, optimizing performance and reliability.
This comprehensive guide will walk you through the entire process, covering everything from essential material selection and detailed assembly steps to crucial testing and professional troubleshooting tips.
I. Getting Started: Essential Tools and Materials
Before cutting the first wire, establishing a complete inventory of high-quality tools and materials is non-negotiable for safety and successful execution.
Required Tools
Crimping Tool: A high-quality, professional-grade crimping tool is a must-have for securely attaching terminals to wires, ensuring low resistance and high durability.
Wire Strippers: Essential for cleanly removing insulation without nicking or damaging the underlying copper strands.
Multimeter: Your primary diagnostic tool for checking continuity, measuring voltage, and ensuring everything functions as intended before final installation.
Wire Cutters: For precise cuts to determine wire lengths.
Required Materials
Wire: Select the appropriate gauge (AWG) based on the maximum current and voltage requirements of your project. Ensure the wire insulation is rated for the environment (e.g., heat resistance for engine bays).
Connectors & Terminals: Pick connectors (e.g., Deutsch, weather-pack) that match the specific devices or systems you are working with.
Heat Shrink Tubing: Used for superior insulation, sealing against moisture, and providing crucial strain relief where the wire meets the terminal/connector housing.
Wire Loom or Conduit: A flexible, durable plastic or fabric covering that keeps the bundle neat and protects the wires from abrasion, heat, and chemicals.
Cable Ties: Used to neatly bundle and organize wire runs.
II. Step-by-Step: How to Assemble Your Wire Harness
1. Start with a Solid Plan
Creating a detailed wiring diagram might seem tedious, but it is the most crucial step for organization and error prevention.
Map Components: Systematically plot all components, switches, sensors, and power sources.
Determine Connections: Clearly define the source, destination, and function of every single wire.
Calculate Lengths: Use the diagram and physical measurements to determine the precise length of wire needed for each run, adding slack for routing.
2. Cut and Strip Wires
With your plan finalized, you can begin processing the raw wire:
Use wire cutters to measure and cut each wire to its desired length, accounting for the length needed for terminals.
Use quality wire strippers to remove the insulation from both ends of each wire. Attention to detail here is vital: ensure you leave enough exposed metal for a secure terminal connection without exposing excess wire that could cause a short. Do not damage the fine copper strands.
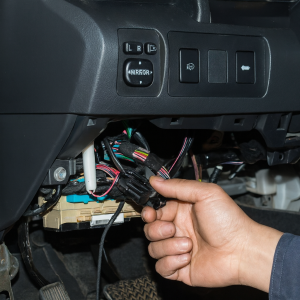
3. Crimping Connectors in Place
This step requires precision to ensure low resistance and maximum strength.
Slide the stripped wire ends fully into the corresponding terminal or connector pin.
Use your dedicated crimping tool (matched to the terminal type) to lock the wire in place. The crimp must be snug and strong enough to resist being pulled out by hand.
Optional Soldering: For critical, high-vibration applications, you can carefully solder the connection after crimping for enhanced security and conductivity.
Apply Heat Shrink: Slide the heat shrink tubing over the terminal/wire junction and apply heat until it contracts and seals tightly.
4. Get the Wires Organized
The goal here is not just neatness, but protection and ease of installation.
Grouping: Group wires logically by function (e.g., ignition wires, sensor wires) or by their destination run.
Bundling: Use cable ties or lacing cord to initially bundle the wires together.
Protection: Enclose the entire bundle in wire loom or protective conduit. This step shields the wires from physical abrasion, heat exposure, and environmental damage within the vehicle’s chassis or engine bay.
5. Test Your Harness
Never skip this phase. Testing ensures you catch errors before the harness is installed and potentially hidden from view.
Continuity Check: Grab your multimeter and check every single wire run for continuity (a closed circuit). Verify that each terminal connects only to its intended terminal at the other end.
Short Check: Check for shorts by testing continuity between adjacent wires. You should have infinite resistance between any two unrelated circuits.
Validate Plan: Verify the color-coding and routing match your original wiring diagram exactly.
III. Pro Tips for a Flawless Wire Harness
Double-Check All Connections: Before sealing the loom, confirm that each wire is secured to the correct terminal. Misconnections are the easiest error to make and the most frustrating to fix later.
Label Wires: Use printed labels or colored tape to clearly label wires at both ends, especially if your harness involves many components or shares common colors. This is an absolute game-changer for future diagnostics.
Invest in Quality Components: Cheap wire often uses fewer strands of copper or a lower grade of insulation. Investing in high-quality, OEM-grade wire and connectors ensures your harness will hold up against heat, vibration, and moisture over the long haul.
Consider Future Modifications: Design with future proofing in mind. Leave some extra capacity in your conduit or add an unused spare wire run for possible future upgrades or accessories.
IV. Troubleshooting Common Problems
Even expert builders occasionally face minor issues during the process:
Frayed Wires: If you see any cuts, nicks, or damage to the insulation or if copper strands were lost during stripping, cut the wire short and re-strip it. A frayed wire is a short-circuit waiting to happen.
Loose Connectors: After crimping, give the wire a firm tug test. If the connector comes loose, the crimp was faulty. Cut the wire, strip a new section, and try again with better pressure.
Grounding Issues: If testing shows power is reaching a component but it fails to function, a poor ground connection is the most likely culprit. Always ensure your ground wires terminate at a clean, bare metal surface with a secure fastener.
V. Wrapping It Up
Building a DIY wire harness is not just about assembling a bunch of wires; it’s about understanding the logic of your electrical system and ensuring it is as reliable and robust as possible. Whether you’re working on a show car, a rugged off-road machine, or a custom electronic device, a well-built wire harness is the key to a smooth, functional, and long-lasting system.
With careful planning, the right professional tools, and patience through the assembly process, you will complete a custom wire harness that offers reliable performance and the deep satisfaction of a job done perfectly. Happy wiring! Contact us for more information.
FAQs
1. Why is having the correct wire gauge so critical for my DIY harness?
Choosing the correct wire gauge is critical because it dictates the wire’s current-carrying capacity.
Too Small a Gauge (High Gauge Number): The wire cannot handle the required current, leading to high electrical resistance, excessive heat buildup, voltage drop, and potential fire hazards.
Too Large a Gauge (Low Gauge Number): The wire is unnecessarily heavy, bulky, and difficult to route, increasing material cost and complexity.
Always refer to a standard AWG (American Wire Gauge) chart and choose a gauge rated for at least 125% of the maximum expected continuous current.
2. How much extra slack should I leave when cutting my wires?
It is generally recommended to leave about 10% to 15% extra slack in your wire lengths, especially in dynamic environments like vehicles. This slack is essential for several reasons:
Routing and Bends: Allows for smooth, non-straining bends around corners and through bulkheads.
Installation Error: Provides margin for trimming and re-crimping a terminal if the first attempt fails.
Vibration and Movement: Prevents the wires from being stressed or pulled tight due to normal movement, vibration, or engine torque.
3. What is the difference between an open-barrel crimp and a closed-barrel crimp, and which should I use?
Closed-Barrel Crimp: The terminal forms a complete, solid barrel around the wire strands. Typically requires a more specialized crimping tool and is common in high-reliability industrial and military applications.
Open-Barrel Crimp: The terminal has two “wings” or tabs that fold over the wire strands and insulation. It is the most common type found in automotive and electronics connectors (e.g., Deutsch, Weather-Pack).
For DIY automotive work, use the specialized tool designed for the specific open-barrel terminals in your harness to ensure a gas-tight, durable connection.
4. Why is heat shrink tubing better than electrical tape for insulating connections?
Heat shrink tubing provides a vastly superior, permanent seal compared to electrical tape:
Moisture Resistance: It shrinks tightly around the connection and wire jacket, often creating a waterproof or highly moisture-resistant seal, preventing corrosion.
Strain Relief: It adds mechanical stiffness to the junction point, reducing stress where the flexible wire meets the rigid terminal.
Durability: It is resistant to abrasions, chemicals, and temperature fluctuations common in engine bays, whereas electrical tape can dry out, unwrap, and leave sticky residue.
5. Can I use house wire (solid core) for automotive applications?
No, you should never use solid core house wire for automotive or dynamic applications. Automotive wiring requires stranded wire, not solid core. Stranded wire is significantly more flexible and is designed to withstand the constant flexing, vibration, and movement of a vehicle without fatiguing and breaking. Solid core wire will quickly fail due to metal fatigue in a high-vibration environment.
6. My multimeter shows “0 Ohms” when I check continuity. Is this good or bad?
A reading of 0 Ohms (or very close to zero, like 0.1 to 0.5 Ohms) between two points is good when checking continuity. It means there is minimal electrical resistance between the start and end of the wire, indicating a strong, complete, and uninterrupted circuit path. If you get a reading of “OL” (Out of Limit) or Infinity, that signifies a break (open circuit).
7. What is “Tinning” and should I solder every connection after crimping?
Tinning is the process of coating the end of a stripped wire with solder before crimping or connecting it.
While soldering after crimping can increase mechanical strength, Tinning the wire before crimping is generally discouraged by professional standards (like those from the Society of Automotive Engineers, SAE). Solder is rigid and can cold-flow over time, potentially loosening the terminal’s grip on the wire strands, leading to premature failure due to vibration. A proper, gas-tight crimp is generally the strongest and most reliable connection.